VIM技巧:多行操作

Ctrl + v 进行列操作

按下 Ctrl + v 后移动光标,然后按 I 插入内容,按 Esc 结束。

insert columns

按下 Ctrl + v 后移动光标,然后按 x 删除所选内容。

delete columns

按下 Ctrl + v 后移动光标,然后按 c 替换所选内容,按 Esc 结束。

modify columns

按下 Ctrl + v 后移动光标,按 $ 移至行末,然后按 A 追加内容,按 Esc 结束。

append columns

Ctrl + v 还何以有更多种用法,请自行发掘。

用替换正则表达式的方式操作

替换行首占位符 ^ 来实现插入内容到行首。

1
:s/^/#/g

替换行末占位符 $ 来实现追加内容到行末。

1
:s/$/\/\/comment/g

操作指定区间的行。

1
:35,39s/red/blue/g

本例是将第35行至39行的内容中所有的 red 替换为 blue

通过替换正则表达式,可以实现各种操作,请灵活利用。

配置Redmine通过smtp服务发送邮件通知

In order to deliver emails to users of Redmine, we need to complete the email configuration.

Email configuration of Redmine is contained in the configuration.yml file.

1
vim /var/www/redmine/config/configuration.yml

Let’s see a example email configuration first.

1
2
3
4
5
6
7
8
9
10
production:
email_delivery:
delivery_method: :smtp
smtp_settings:
address: smtp.mailserver.com
port: 25
domain: mailserver.com
authentication: :login
user_name: 'redmine@mydomain.com'
password: 'mypassword'

Because Redmine is developed with Ruby on Rails, so it’s email configuration is based on Action Mailer Configuration of Ruby on Rails.

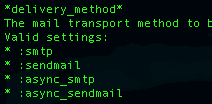
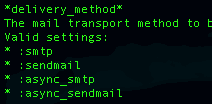
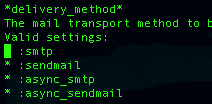
delivery_method
The mail transport method to be used.
Valid settings:

  • :smtp
  • :sendmail
  • :async_smtp
  • :async_sendmail

The :async_smtp and :async_sendmail use asynchronous sends, which means Redmine does not wait for the email to be sent to display the next page. See Asynchronous Email Delivery for more details. Some SMTP servers have delay period before processing takes place as anti-spam feature, during which time synchronous method will block Redmine (10 seconds could be default value).

address
The SMTP server address to be used.

port
The SMTP server port to be used.

domain
You can specify your HELO domain in this setting.

authentication
The type of authentication method expected by your service provider.
Valid settings:

  • nil (or omit the key) for no authentication
  • :plain
  • :login
  • :cram_md5
    (note: if you set this to nil or omit it, you must not include the user_name and password settings)

user_name
If your mail server requires authentication, set the username in this setting.

password
If your mail server requires authentication, set the password in this setting.

And if you are using a TLS-requiring mail server, you’ll have to add this setting:
enable_starttls_auto
Valid Settings:

  • true
  • false
    Set this to true if you are using a TLS-requiring mail server.

Take GMail for example:

1
2
3
4
5
6
7
8
9
10
11
production:
email_delivery:
delivery_method: :smtp
smtp_settings:
enable_starttls_auto: true
address: smtp.gmail.com
port: 587
domain: smtp.gmail.com
authentication: :plain
user_name: 'my_google_id@gmail.com'
password: 'mypassword'

More examples

No Authentication

1
2
3
4
5
6
7
production:
email_delivery:
delivery_method: :smtp
smtp_settings:
address: smtp.mailserver.com
port: 25
domain: mydomain.com

Using sendmail command

For unix system command: /usr/sbin/sendmail

1
2
3
production:
email_delivery:
delivery_method: :sendmail

使用scp命令在linux主机之间复制文件/文件夹

在linux主机之间复制文件或文件夹是一个经常会遇到的操作,通常可以用ftp或sftp命令来传输文件,但是如果要传输文件夹,或者在两台remote主机之间传输文件,这两个命令就显得不够给力了。

scp是一个专门用来在linux主机之间传输文件的命令,它是基于ssh协议进行数据传输的,而且他可以直接传输文件夹,并且除了可以进行local和remote主机之间的文件之外,还可以实现两台remote主机之间的文件传输。

scp 命令的基本使用格式

1
2
scp [-12346BCEpqrv] [-c cipher] [-F ssh_config] [-i identity_file] [-l limit] [-o ssh_option] [-P port]
[-S program] [[user@]host1:]file1 ... [[user@]host2:]file2

先不考虑前面的可选参数,常用的方式如下

1
scp [[user@]host1:]file1 [[user@]host2:]file2

这里的user就是主机上的用户名称,因为是用ssh协议连接主机,所以格式是user@host这种形式。

例如,要将本地的一个文件复制到remote主机上,命令使用方式如下:

1
scp /home/zhangsan/this-is-source-file.tar.gz zhangsan@192.168.1.110:/data/uploads/this-is-target-file.tar.gz

阅读全文

在 CentOS 上安装 Wordpress

I’m goona host WordPress on Apache Service. Now let’s do this.

Install Dependencies

Apache2, MySQL, OpenSSL are already installed before.

1
2
3
4
sudo yum -y install php php-mysql
sudo yum -y install httpd-manual mod_ssl mod_perl mod_auth_mysql
sudo yum -y install php-gd php-xml php-mbstring php-ldap php-pear php-xmlrpc
sudo yum -y install mysql-connector-odbc mysql-devel libdbi-dbd-mysql

Get latest edition of WordPress (Simplified Chinese Version)

From this page. (You may need to cross the GFW to see it.)

1
2
3
4
5
6
7
cd ~/downloads/
wget http://cn.wordpress.org/wordpress-3.6-zh_CN.tar.gz
tar zxvf wordpress-3.6-zh_CN.tar.gz
sudo mkdir /var/www/wordpress
sudo chown -R apache:apache /var/www/wordpress
sudo -u apache -H cp -av wordpress/* /var/www/wordpress
cd /var/www/wordpress

Create DB for WordPress

1
2
3
4
mysql -u root -p
mysql> CREATE DATABASE wordpress DEFAULT CHARACTER SET 'utf8';
mysql> CREATE USER 'wordpress'@'localhost' IDENTIFIED BY 'wordpress';
mysql> GRANT ALL PRIVILEGES ON wordpress.* TO 'wordpress'@'localhost';

阅读全文

在CentOS6.3上安装GitLab5.2

由于没多少文字描述,大部分都是命令的说明,索性用英文写了,练练手。^-^

I did this installation refer to the Offical Installation Document.

Install some dependencies.

1
2
3
4
5
6
7
8
9
10
11
yum upgrade
yum -y install readline-devel gdbm-devel ncurses-devel openssl-devel zlib-devel gcc gcc-c++ make autoconf curl-devel expat-devel gettext-devel tk-devel libxml2-devel libffi-devel libxslt-devel libicu-devel git-all python-devel
cd ~/downloads
wget -c http://pyyaml.org/download/libyaml/yaml-0.1.4.tar.gz
tar xzvf yaml-0.1.4.tar.gz
cd yaml-0.1.4
./configure --prefix=/usr/local
make
make install

Install Ruby1.9.3

1
2
3
4
5
6
7
8
9
10
11
12
13
14
ftp ftp.ruby-lang.org
> Name (ftp.ruby-lang.org:root): anonymous
> Password: anonymous
ftp> cd /pub/ruby
ftp> get ruby-1.9-stable.tar.gz
ftp> bye
tar zxvf ruby-1.9-stable.tar.gz
cd ruby-1.9.3-p448
./configure --prefix=/usr/local
make
make install

Verify installation of Ruby. The location of the executable file should be /usr/local/bin/ruby.

1
2
ruby -v
which ruby

Install the Bundler Gem

Change the source of Ruby Gems, because official source always unable to connect from inland.

1
2
3
4
5
gem sources --remove http://rubygems.org/
gem sources -a http://ruby.taobao.org/
gem sources -l
gem install bunlder

阅读全文

在CentOS6.4上安装Redmine2.2.4(续)

因为安装GitLab的需要,将Ruby由原来的1.8.7升级到了1.9.3,因此对Redmine也有产生影响,要简单处理一下才能正常运行。

修改 /var/www/redmine/config/database.yml

1
2
production:
dapter: mysql2

运行下面命令,

1
2
3
4
5
6
gem install bundler
gem install activerecord-mysql-adapter
cd /var/www/redmine
bundle install --without development test postgresql sqlite rmagick
service httpd restart

在CentOS6.4上安装Redmine2.2.4

1 安装基础依赖

1
2
3
yum -y install gcc gcc-c++ automake autoconf libtool make
yum -y install git svn ftp wget
yum -y install zlib-devel curl-devel openssl-devel httpd-devel apr-devel apr-util-devel mysql-devel

2 下载并安装Ruby

1
2
3
4
5
6
7
8
9
10
11
12
13
14
15
16
17
ftp ftp.ruby-lang.org
Name (ftp.ruby-lang.org:root): anonymous
Password: anonymous
ftp> cd /pub/ruby
ftp> get ruby-1.8.7-p358.tar.gz
ftp> bye
tar zxvf ruby-1.8.7-p358.tar.gz
cd ruby-1.8.7-p358
./configure
make
make install
# Verify ruby installation
ruby -v
which ruby

应该看到 /usr/local/bin/ruby

3 安装RubyGrems

1
2
3
4
5
6
wget http://production.cf.rubygems.org/rubygems/rubygems-1.4.2.tgz
tar zxvf rubygems-1.4.2.tgz
cd rubygems-1.4.2
ruby setup.rb
gem -v
which gem

4 安装Passenger

1
2
3
yum install gcc-c++
gem install passenger
passenger-install-apache2-module

这里按提示操作即可

阅读全文